Changing of smartphones is something that happens regularly especially with the rate at which smartphones are released these days.
Most smartphones store their contacts on the phone memory, therefore it can become burdensome if one tries to transfer contacts from the iPhone to another phone.
Therefore I decided to write a step by step guide in how you can transfer your contacts from iPhone to any other phone.
Requirements:
iTools 2012
iPhone cable
Computer
Steps
1. Download iTools 2012 http://dl.itools.hk/download/itools_win/software/iTools0216E.zip.
2. Install iTools and run it
3. Connect your iPhone to the computer and iTools will detect your phone.
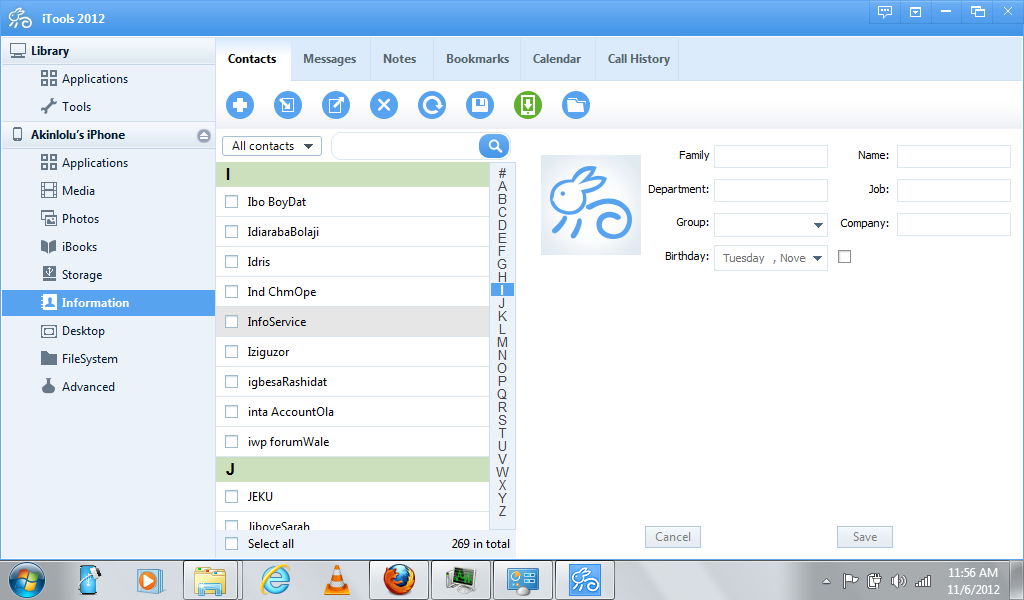
4. Click on "Information" at the left pane of the page
5. Click on export at the top menu bar (a box with arrow pointing up diagonally) of the page then select "Export as VCF file" or choose Export to Outlook if you prefer Outlook
6. Choose a place to save it if you are going for VCF file. E.g Desktop
7. After saving to your desired location, you can copy it to the memory of your new phone or bluetooth it or even mail it to your new device
8. Once that's done, open the file in your new phone and all your contacts should display in the contacts folder of your new device.
Most smartphones store their contacts on the phone memory, therefore it can become burdensome if one tries to transfer contacts from the iPhone to another phone.
Therefore I decided to write a step by step guide in how you can transfer your contacts from iPhone to any other phone.
Requirements:
iTools 2012
iPhone cable
Computer
Steps
1. Download iTools 2012 http://dl.itools.hk/download/itools_win/software/iTools0216E.zip.
2. Install iTools and run it
3. Connect your iPhone to the computer and iTools will detect your phone.
4. Click on "Information" at the left pane of the page
5. Click on export at the top menu bar (a box with arrow pointing up diagonally) of the page then select "Export as VCF file" or choose Export to Outlook if you prefer Outlook
6. Choose a place to save it if you are going for VCF file. E.g Desktop
7. After saving to your desired location, you can copy it to the memory of your new phone or bluetooth it or even mail it to your new device
8. Once that's done, open the file in your new phone and all your contacts should display in the contacts folder of your new device.

Comments
Post a Comment