A large portion of Android device users like to tinker with their devices, they like deleting unneeded items and files, they like rooting their phones, and installing customs ROMs that appeal to them. Thanks to the open source nature of the operating system. Although these activities are not recommended by smartphone manufacturers, but nonetheless, its being done.
While these tinkering activities can end up well bringing smiles, it can equally also go wrong. One of the things that can happen is a corrupted IMEI profile that can happen either while flashing custom or stock ROM.
Have no fear, the procedure below can fix that IMEI error with the help of MTK Droid Tools. Just follow the steps below one after the other.
Needed Items
- Root access on the phone
- MTK Droid Tool: Download here
- Your IMEI Number, usually written at the back of the phone when batteries are removed or at the pack of the phone
- Android ADB drivers, depending on the phone you are using but there is a universal version: Download here
Procedures
1. Extract the MTK droid tools you downloaded. It would be extracted to the same folder the zipped file was except you change the location. On extraction, you would get a "MtkDroidTools" folder.
2. Open the folder and click on MTKdroidTools.exe to launch it

3. Install the ADB drivers if it has never been installed on the computer before. Connect the phone into the computer. On connecting, it would be identified with phone's information displayed. IMEI would be displayed too if its not having issues. But if an issue is present with the IMEI, it would be missing.
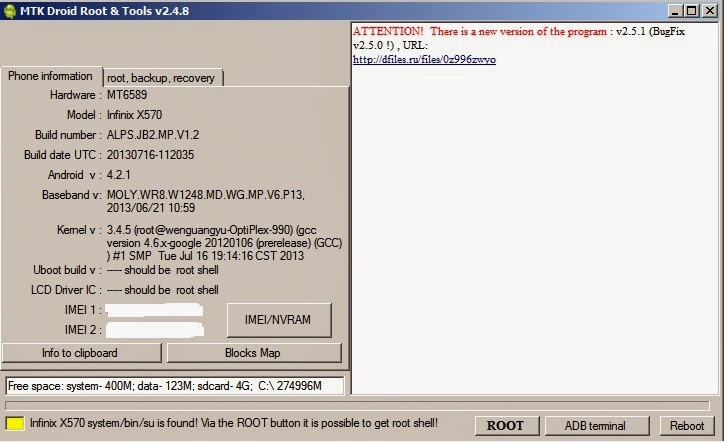
4. Now click on the ROOT button at the bottom right of the page. This button would be greyed out if the phone wasn't already rooted. So you really need to root your phone before you begin the process. Root access is needed for the tool to run scripts.

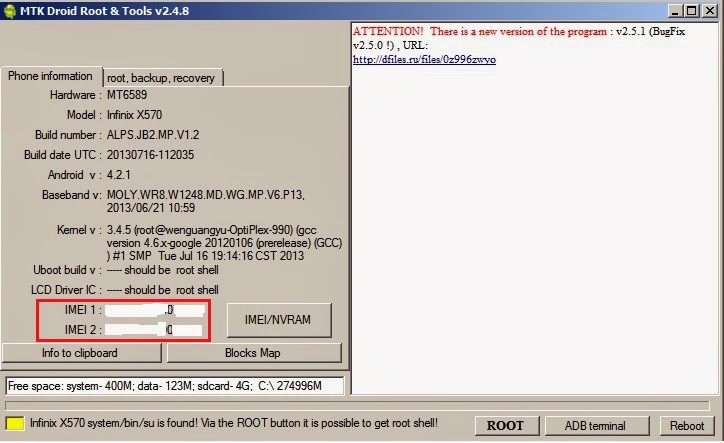
5. It will ask if you want to 'receive root shell through already established SU', just click 'Yes'.
Once that has been done, click on the 'IMEI/NVRAM' tab close to the IMEI part.

On clicking 'IMEI/NVRAM', the window below would appear.
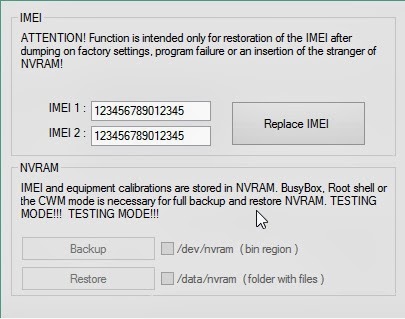
You would need to type in your IMEI number as seen from your phone case or inside the phone and then click on Replace IMEI.
6. You would be asked if you want to replace your IMEI, click Yes and then another window will tell you that 'changes will come into force after reset'. Click OK and then reboot your phone.
7. After reboot, your IMEI error should have been fixed and you are good to go. You should also backup your IMEI next time before you carry out any modding or flashing on your phone.
Credits go to RUA1 of XDA for developing this awesome tool for this IMEI issue.
Like our Facebook page and follow on Twitter for more smartphone tutorials and guides.
I did as it was mentioned nothing happened.
ReplyDeleteIt Helped me restore IMEI on my Walton Primo EF (MT6572 FDD Codename Rel). Thank you very much.
ReplyDeletei have rooted. and i clicked root, and the color changed to green, but IMEI/Nvram didn't highlight to be clicked
ReplyDeleteSame here. Did you find a solution?
Deletegud day if you dnt mind can you please re upload the link in ANDROID ADB DRIVER cause it looks the link has already forfeit TIA
ReplyDelete